Before and After: Ikea Table Becomes Katie's Chic New Desk
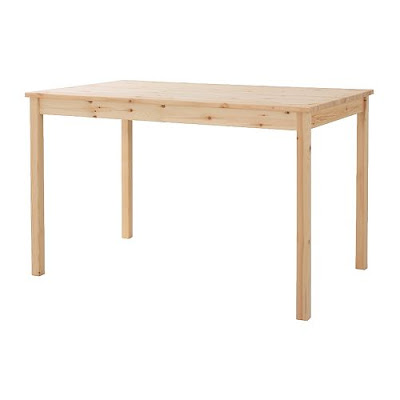
Do you recognize this table? Sure you do. It's an Ikea Ingo $69 basic unfinished dining table. That was easy. But here's a hard one.
Do you recognize this table? It, too, is an Ikea Ingo, after being stained green, used and abused by a family of 5 for 12 years, and finally relegated to the garage. I didn't stage this photo. That's my old Ingo in it's natural habitat. Please don't call that "Hoarders" show on me. Jon and I bought it 12 years ago as poor newly weds living in Austin. Of course, there was no Ikea in Austin back then, so we had to drive to Houston to get it. But we had a got a heck of a lot of use out of that thing. So many meals, family memories, birthday cakes, Saturday breakfasts, Jon studying for the MCAT with tiny Ethan in his lap. Anyway, now that we're poor oldly weds, I decided to excavate it from the garage and do something with it. And I needed a desk. Ready?
It cleaned up pretty nicely, huh? I can't believe it's the same table. It was really pretty easy. I just cut a few strips of 1x2 to make the sides. The base of the new side (that horizontal strip on the floor) is a 2x2. I joined all the pieces of wood with dowels. Here's the Tao of Doweling:
This is my favorite way to join wood because it doesn't require any special tools other than a drill, it makes a clean joint with no hardware sticking out, and the bond is as strong as hercules. It's easy, too. Just (1) drill a hole, (2) fill it with glue and stick a piece of dowel in it, (3) drill a hole in the other piece and fill it with glue or get the dowel all gluey (you can't use too much glue) and (4) shove it all flush and wipe up the glue overflow.
For this desk I laid out all the wood strips on the floor and joined them first. Then I had to drill the holes all the way through the Ingo legs and slide the whole side structure in. After the glue dried, I filled the holes with wood filler and sanded it smooth. I also used paintable caulk to make the seams where the wood strips meet very flush. Then tons of sanding over the whole thing and about 4 coats of glossy white paint.
Not bad for an Ikea hack! I don't even know what I spent. Maybe 5 bucks? And now I have an awesome desk! Maggie gets under there and looks out the "window" and calls it her treehouse. Hahaha.


amazing! i want one :)
ReplyDeleteCan you please tell me the measurements of each cut of wood? Also, did you use dowels to connect the inner square and connector pieces as well?
DeleteBrilliant!
ReplyDeleteHello from the Twin Cities :)
- Irina
Totally gorgeous- inspiration for the rest of us as sure we all have one of these from IKEA from when we first married!
ReplyDeleteYou are sooo clever!
Melissa- Miss Sew & So
xx
It's just a fairy tale! The table has earned such a change. He will thank you and last a long time!
ReplyDeleteThanks for the ideas!
love, love, love it! you are crazy creative! thanx for sharing.
ReplyDeleteVisiting you from AT. I couldn't believe my eyes when I saw this table/desk transformation. Brilliant!
ReplyDeleteWow!
ReplyDeleteOh, My, GOODNESS! This is SO inspiring me, as I have been looking at these tables to use as a desk for about a month now, but I know I want to do something more to it. I LOVE it! <3
ReplyDeleteAwesome! Can you tell me what length the cuts are?
ReplyDeletewow, absolutely beautiful!! so inspiring!
ReplyDeletebeautiful, I see the wonderful embroidered textiles every saturday I visit the MERCADO here in Mexico City...if I may, I'd like to share with my blog's readers this fabulous project!!
ReplyDeleteA-Maz-ing! Thank you for sharing, I'm going to try this too:)
ReplyDeleteFabulous!! Drat - I just gave a similar Ikea table away! But this has inspired me!
ReplyDeletethis reminds me of jonathan adler! LOVE!
ReplyDeleteWOW!! Glad that my SIL gave me hers after their reno. I've been using it until we find the "perfect kitchen table"... now I have plans for it!! ;)
ReplyDeleteAbsolutely fabulous!
ReplyDeleteOld is new again! Brilliant!!
ReplyDeleteWOW! it's gorgeous, congrats!
ReplyDeleteA really lovely transformation. I love seeing IKEA hacks!
ReplyDelete~Stop Me If You've Heard This One
Too awesome . . . that turned out completely amazing.
ReplyDeleteAnd, can I be an oldy-wed, too? After 7 years? Because, I really like the sound of that.
Nice way to turn old pieces into new! It's as good as new with a nice white coat of paint :)
ReplyDeleteI love the way your table looks. Where did you get that cute frame on a stand sitting on the table? I like that you're able to hang items from it.
ReplyDeleteUm, this is completely amazing. You are awesome!
ReplyDeleteThis is brilliant!
ReplyDeleteI never would have thought of doing this but it looks really professional when completed!
ReplyDeleteKeep up the good work, you are a real inspiration!
Yaz
x
LOVE IT!!!!!!!!!
ReplyDeleteSuper cool! I have an old table that's "blah" looking.. maybe I can try this! Thanks!
ReplyDeleteLOVE!!!!
ReplyDeleteI must say absolutely beautiful hack! Your 12 year old table was re-born from an ugly duckling into a beautiful swan :)
ReplyDeletewww.mysilpada.com/florence.lewis
Wow-so impressed! Fantastic, creative hacke!
ReplyDeleteThis is delightful to look at! I'm jealous!
ReplyDeleteThis is amazing! What a vision.
ReplyDeleteWhat an incredible eye you have! So talented! I love what you did with this desk.
ReplyDeleteFound you via vmac+cheese and am now following :)
fashiontruffles.blogspot.com
That chair is just gorgeous! and i am definitely going to do that to my ikea table! I love that look.
ReplyDeleteWhat a great desk! I've been teetering with a few options and now I'm going to have to add this to the mix too.
ReplyDeleteThanks for sharing!
Lauren from www.dwellanddine.com
This is gorgeous! What a great idea! Well done and what a great way to update something! Love it!
ReplyDeleteDo you have the cut wood dimensions?
ReplyDeleteI would love the dimensions as well!! Also... beautiful rug! Might I ask where you got it? Thank you :D
ReplyDeleteJust amazing! Love the transformation. I am going to pin this!
ReplyDeleteLove, Love, Love! I am looking at one of those tables right now in my dining room.....need to update it now and make it outstanding! Thanks.
ReplyDeleteAmazing! You did a fantastic job.
ReplyDelete~Michelle
Fantastic! Terrific project.
ReplyDeletefirst time to your blog...you are crazy creative and wicked funny. Keep it up, I am a new, inspired follower.
ReplyDeletei love the table transformation! You brought it back to life ;)
ReplyDeleteNice, very "West Elm"
ReplyDeleteWow what a transformation! I love it. Great idea.
ReplyDeleteDo u have the cut dimensions? What was used as the center frame?
ReplyDeleteYou've done a fabulous job, it's gorgeous and I have this linked to my Ikea post too today - for inspiring Ikea hacks!
ReplyDeleteWonderful. This seems to have gone viral in the blogosphere, and deservedly so.
ReplyDeleteHas anyone received the dimensions for the wood?? LOVE the idea and seriously want to re-create it! Please let me know!
ReplyDeleteFrom what I can tell in the photos, you need 1x2" wood, measure the distance between the table legs (or holes you plan to drill in them), divide that distance into thirds, and cut all your pieces to that length. You should need 16 pieces total, plus the two 2x2" base pieces.
DeleteGreat Idea! Need the measurement as well please!!
ReplyDeleteThanks for showing how to use dowels as fasteners. But how do you fit them in if the table legs are already in place, or did you remove one leg to place the inset, or what?
ReplyDeleteBecky
This is amazing! Great idea, thank for sharing.
ReplyDeleteThis is amazing!! Such a great idea on an IKEA hack!
ReplyDeleteCorbin
I would also love to know what kind of paint you used. Was it a special furniture paint?
ReplyDeleteyou are awesome, congrats :)
ReplyDeleteAwesome! Such a good idea. Love it.
ReplyDeleteLove this! Could you give the measurements for the end design pieces? Thanks!
ReplyDeleteAnd the dowels in the "window"? I noticed the wood pieces are cut at 45°. Are the dowels stuck in a 90° angle to the wood surface?
ReplyDeleteGreat hack! So effective.
ReplyDeleteI would really like to know the dimensions of the square, too! Or the distance of the legs on the side, so I can approximate it...
ReplyDeleteAnyone, who can help?
How big is your square on the sides? Trying to figure out dimensions. Thanks! :)
ReplyDeletewhen you apply the paint do you use a brush? doesnt it leave streaks from the paint?
ReplyDeleteThis is cool! you make the table look better. find some info about the idning table with bench on my blog :)
ReplyDeleteBrilliant idea! Thanks for sharing :-)
ReplyDeleteFatima | www.blogsbyfa.com
Nice article. This is so much more than I needed! But will all come in use thanks!
ReplyDeleteIKEA Table Hack
Visiting you from AT. I couldn't believe my eyes when I saw this table/desk transformation. Brilliant!
ReplyDeletelinen pillowcase hair
blue geometric pillow
solid pillows cotton