How to transfer inkjet images to wood

Here we go! This is what you'll need. Mod Podge, Elmer's washable glue, and a piece of cardstock.
Step 1: Brush the Elmer's glue onto the cardstock in a nice smooth layer.
Make sure you cover the area where you will be printing. Let it dry.
Step 2: With an inkjet printer, print an image onto the glue side of the cardstock.
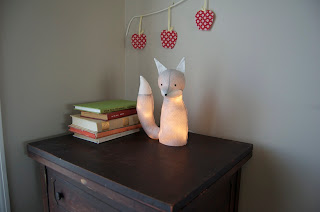
Step 3: Brush a smooth, thin layer of Mod Podge onto the wood.
Step 4: Stick your image face down onto the wet Mod Podge. Press and smooth to make sure the image has good contact with the wood. Let it dry OVERNIGHT. Don't peek too soon!

Step 5: Soak it. You can dunk it in water, run it under a faucet, or squirt it with a spray bottle. Let the cardstock get really wet and soft. Gently peel off the cardstock. I held this under running water while I peeled it. You can gently rub the image with your finger tip to loosen any remaining paper pulp.

Oh my god, your a genius! I can't wait to try this! It looks great!
ReplyDeleteAwesome! We'll all just need to make sure we print all our words backwards so they show up the right way on our wood ;o)
ReplyDeleteI think you are the smartest woman I know! I can't wait to give this a go!! You just set me up for all the Christmas presents I'm going to give this year! Thank you! Thank you!!
ReplyDeleteThank you thank you! And, YES, print backwards. Oops!
ReplyDeleteHow do you reverse the print? I can't find any setting anywhere on my printer to mirror or reverse??
DeleteThanks!
Wowza!
ReplyDeleteI know what I'll be doing this afternoon - thanks for sharing!!!
Gorgeous. I was wondering if it would be similar to the packing tape transfer method and it somewhat is. Definitely much cooler, of course, but now I won't be so nervous to try it! Thanks, Katie!
ReplyDeleteCan you tell me more about that packing tape transfer method? Sounds really interesting.
DeleteThis is amazing!!!!! I can't wait to try it. I have the perfect project to try it on. Thanks, Katie!
ReplyDeleteWow. I just found your blog and am SO GLAD I DID!! What an awesome trick!! Thanks for sharing!! :)
ReplyDeleteThat looks awesome! Thanks for sharing, I can't wait to give it a whirl.
ReplyDeleteWow!!! Brilliant!
ReplyDeleteOK - I've tried this twice now - my results haven't been great. The image is rubbing off with the paper pulp. I'm rubbing very gently. What do you think the problem is? Should I use a thicker layer of modgepodge? Maybe more glue on the paper? I let it dry for an agonizing hour before I removed the paper - should it have been longer? Any tips you can give me would be great! I'll keep trying. . .
ReplyDeleteKim, did you print directly onto the glue? You don't need a very thick layer of mod podge, but the wood has to be coated really well. Make sure you really stick the paper on there well, really press it down hard. And everything (the elmers and the mod podge) has to be extremely dry. I let my mod podge dry overnight. And then get the paper extremely wet and soggy. Like right now when I rub my wood block under the water, no ink will come off at all. Post again and we can troubleshoot some more if you need to.
ReplyDeleteKatie, you rock! Wouldn't it be adorable to make a set of building blocks for kids, with houses and trees and dogs and people on them? And words? So cool!!!
ReplyDeleteOk, guys, I added in the tutorial to let it dry overnight.
ReplyDeleteThanks Katie! I'm going to set some new ones up now and let them dry overnight - I'll let you know tomorrow how it turns out! I just can't wait! Thanks!!
ReplyDeleteHoo boy!
ReplyDeleteI'm moved to de-lurk (un-lurk?) on account of the AWESOME!
This is a totally a hand-crafted Christmas present game-changer, and really masculine friendly. I'm seeing key chains and perhaps even something man jewelery-like. Thanks heaps for the sharing!
Katie! I love this. I would like to repost this on my blog. I feature Mod Podge inspiration. If you have time, please come see me.
ReplyDeleteYou rock! Seriously I am drinking your crafty kool-aid and bowing down! I cannot WAIT to try this! But I have to wait...I still haven't had time to tackle sewing that squirrel. lol Very soon though! If I can convince my husband to let me run glue coated paper through his printer, that is. Good work oh Goddess of Craftiness!
ReplyDeleteHaha my husband was the same way about the printer. He freaked when I said I ran glue covered paper through it. But I showed him the cardstock and how smooth and not gloppy it was. You can hardly see anything on it once the elmers dries. Then he was okay with it.
ReplyDeleteYou guys are all awesome by the way. Each and every one of you. Uh oh, here comes the barfing drunk sorority girl...hold my hair back!
(Amy! I emailed you!)
this is even better than i thought. janets reply up there has me laughing. i second the goddess of craftiness crown goes to you!
ReplyDeleteOK - I hope I'm not being a pill:) - I let it dry overnight and the ink is still smearing when I soak the paper off. I'm wondering what ink setting you used on your printer? Draft, Text/Image, Best Image? I used text/image and maybe the ink is too thick? I'm going to let the other ones I prepared last night dry for the rest of today too before washing the paper off. Maybe it has to dry even LONGER. Oooo it is soooo hard to wait!! I'll keep you posted on the progress if you want.
ReplyDeleteKim, I used my epson inkjet printer and epson ink. Does the ink come off entirely? I'm not sure what's happening. Oh hey I just thought of something. The first time I tried it, I stuck the paper down onto the wet mod podge and it accidentally slid a little bit and the edges of the image looked smeared. I redid it and pressed it really straight down and used less mod podge so it wasn't too slippery.
ReplyDeleteemail me: matsutakeshop@yahoo.com
we'll figure it out!
Brilliant! Can't wait to try it.
ReplyDeleteHow have I never seen your wonderful blog?? I'm adding you to my link list right this minute :)
You are a crafting Genius!!! I can't believe this I've always hated the little rim from the iron transfers.
ReplyDeleteI'm so trying this and then probably featuring this on my blog. Everyone should hear about it!
Kim, make sure it's not a laser printer that you're using. I'm sure you're not, but I've found that sometimes it creates a much wetter, less set ink.
ReplyDeleteKatie-
ReplyDeleteWe were wondering if you'd be interested in doing a little trade....some blog attention for blog attention. We love your cute decorating ideas, crafts, and diy stuff, and would like to invite you to do a Sunday guest post on our blog. We think our readers, mostly mothers of younger kids would really love your ideas. In exchange, we would just ask that you do a little post on your blog telling your readers, to come see your post and check out our blog... because our blog rocks!
Check us out at www.oneshetwoshe.com
Jessica and Mariel
I found your blog via Bloesem Kids. You are a genius. I, of course, had to go back through all of your past posts.
ReplyDeleteI've never made anything with wood before. I'd love a basic tutorial on how to get started!
You are amazing. Thanks for sharing your craft with the rest of us.
Katie--this is brilliant, you know--right? Also, I am so happy you are gaining all this following--you totally rock and the rest of the blog reading world should know it. I cannot wait to get home and find an application for this...I know there HAVE TO be christmas gifts that will grow out of this technique.
ReplyDeleteThis is just fantastic! Thank you for sharing this. K
ReplyDeleteWe dont have Elmers glue down here in Australia do u have any other suggestions??
ReplyDeleteKelly - I'd think any kind of washable glue should work. Some kind of white craft glue that washes away in water. I can't believe you don't have elmers! We used to pour out a blob in our desks in elementary school, let it dry, and cut fake fingernails out of it.
ReplyDeleteThis is awesome. I am going to link to this project early in November from Dollar Store Crafts. Now I'll have to break down and finally buy some Mod Podge (the only craft supply I DON'T have) to do this!
ReplyDeleteHow brilliant! You are so inspiring to me. Thanks for sharing your gifts with the world! I'll jump on that Kool Aid train! :)
ReplyDeletefantastic, I can't get mod podge or elmers so I will have to play around with the local stuff. Thanks.
ReplyDeleteBrilliant tute. Thanks!
ReplyDeleteThanks, guys! Jojoebi, just make sure that one glue is washable and one is not washable. That's the key.
ReplyDeletewonderful! I love it :) thanks for sharing!
ReplyDeleteHow completely cool! I cannot wait to give this a shot!
ReplyDeleteahhh right, thank Katie
ReplyDeleteI wonder if Kim's problem doesn't have something to do with the type of ink her printer uses -- dye vs pigment ink? http://www.oddparts.com/ink/faq19.htm
ReplyDeleteReally cool trick though -- can't wait to try it!
Epsom has the best non-smearing inks of any, that could be it.
DeleteJudi
Kelly, I'm pretty certain that Elmer's is just stock standard PVA glue, you should be able to find that pretty much anywhere :)
ReplyDeleteGreat technique, I shall have to give this a try!
I can't get over how brilliant this is! You have earned yourself a new fan.
ReplyDeleteHello again! I'm posting for the second time because I came up with a solution that I think everyone will find useful. I too was having a hard time getting the paper off without losing some of the image. (I let it dry overnight and I'm using Epson quality inks as well) Here's what I did...
ReplyDeleteI coated a TRANSPARENCY with the glue, printed on that and then adhered it to the mod podge. This worked awesome because:
1) I didn't have to wait overnight - only long enough for the Mod Podge to dry.
2) It peeled right off the transparency! No soaking no rubbing.
3) Since it's a transparency, you can see where you're placing the image on the wood and you can see any air bubbles that need to be smoothed out.
4) You can use the transparency over and over again.
This is such an incredible technique. Thank you SO MUCH for sharing it!
Is it possible you can go over the tranparency part again or show us what you are using and how it works. It sounds great but I am a little confused. Thanks!
DeleteI was am giving the transparency thing a try since I seem to have the same problems with paper. I am hoping to give this a try tonight! Just wondering, once the Mod Podge is dry, do you put the whole thing under water to remove the transparency? Or does the transparency just peel off? Thanks for the suggestion!
DeleteDawn, what is a transparency? and where might I find one? Thank you! :)
DeleteI'm going to try that Dawn as I have tried doing it on ply wood and hate getting ply wood wet, and half the ink disappears... 've experimented with PVA's instead in Mod Podge but havent had much luck...
DeleteI'm quite happy so far but if any one wants to print onto painted wood - use an acrylic pint and not emulsion as thats washes off too!
Good luck!
Thanks, Dawn! That's a great idea. Maybe I should make a video to show me peeling the paper off.
ReplyDeleteThis is fantastic! I'm going to use this technique this weekend. Thank you so much for sharing!
ReplyDeleteAwesome, I can't wait to try this myself. (Day job really cuts into my play time.)
ReplyDeleteThat.is.cool. Thanks for sharing!
ReplyDeleteThis is truly amazing!! I've worked with transfers before, but nothing comes close to this one.
ReplyDeleteOkay, found you via Modge Podge Rocks, AND what a find!!
ReplyDeleteWe a magician gives away the secret to their trick, we can't help but smile hugely.......You've just put a HUGE smile on my face.
I just came over from Mod Podge Rocks and this is a fabulous idea and tutorial. Thank you for sharing - I can't wait to give it a try!
ReplyDeleteChelsea
I also followed you from Mod Podge Rocks and I am so excited to have found you and this marvelous technique! I can't wait to try it out! If I do, I'll blog about it and I will let my readers know about your terrific tutorial!
ReplyDeleteMolly
http://mollylee.etsy.com/
http://mollyleecards.blogspot.com/
awesome technique - will try this weekend!
ReplyDeleteWow! I had been trying to think of a way to do something like this and was considering using decal transfer paper or temporary tattoos... but this looks amazing, and inexpensive!
ReplyDeleteTHIS is BRILLIANT! First time here… Thanks so much for your instruction. I can't wait to try this—just in time for Holiday Gifts!
ReplyDeleteoh, i have to try this! i hope i'll find similar products in germany ...
ReplyDeleteA.MAZ.IMG. I WILL FOLLOW YOU ANYWHERE, NOW....well, almost, I'm a Wisconsin girl, so I gotta keep it on this side o' the river in regards to my loyalties....but you get the picture!
ReplyDeleteTHANKS FOR THE AWESOME IDEA!
I got Brett Favre to cross over. He did it for the mod podge.
ReplyDeleteOMGosh that's so freakin awesome! I don't know how you ever figured this out but I'm glad you did. This will make giving homemade baby gifts, custom picture frames and so many other things SOOO much easier! Thanks
ReplyDeleteYou are brilliant!
ReplyDeleteI'll definately try this one out for sure!
I LOVE this! Thank you so much!
ReplyDeleteYou Rock!
Sheila
Hi Katie, I'm back. I just wanted to tell you that I spoke of your tutorial on my blog and connected it to your blog.
ReplyDeletehttp://halohill.blogspot.com/2009/10/very-cool-tutorial-ink-jet-transfer-to.html
Thanks again for the wonderful lesson!
Sheila
OH MY GOSH - where were you a year ago when I needed this for a Christmas present??? I purchased this ridiculously expensive transfer paper that was "supposed" to transfer to wood - and no such luck. I CANT WAIT to try this!!! Thank you for being so smart :)
ReplyDeleteWhhhaaaaattt? How cool is this? This would be pefect for....oh my goodness, too many things to name. Thank you for sharing this awesome idea!
ReplyDeleteAnother Aussie here. Can you help me with what Mod Podge is? I've googled and found that its PVA glue, but I'm also finding that Elmers is PVA too. Are they the same type of glue jsut in different thicknesses? Or is one a paste (if so which one please!)We have something called Clag paste here which is a wheat starch paste. Is that it ?
ReplyDeleteI'd really like to try this.
Gosh darnit, I would love to try this if my silly printer would actually do it's purpose and PRINT. Anyway, thanks for the sweet tip, I've played around unsuccessfully with Mod Podge transfers before and I think your trick with the Elmer's Glue (and waiting overnight!) would help a great deal. Thanks again for the write-up! I love folks like you who share their experiences so others can learn! I'm all misty-eyed.
ReplyDeletedear katie,
ReplyDeleteplease could you tell me, do you think i can use elmer's washable glue sticks also? it's the only "size" i could find in germany ...
thank you
Hey you guys outside the US! The main difference, I think, between the two glues I'm using is that one of them washes off in water (the elmers) and one is waterproof when it dries (mod podge). So I'd say play around with whatever products you have available to you as long as one is waterproof and one washes away. I don't know if glue stick would work, because I think it might be too gummy when you print on it? I'd hate for you to foul up your printer trying this.
ReplyDeleteBest of luck. Please post a comment if you find good products in your countries that work for you!
Amazing.
ReplyDeleteLove it! Can't wait to try it out! Cheers, Julie
ReplyDeleteHello Katie, thank you for the great technique! I linked to your blog here: http://www.boardgamegeek.com/thread/456884
ReplyDeleteFor all the Australian crafters - Mod Podge is easy to find here. Go to google, input "mod podge .au" (without the " "). There are 100s of listings.
ReplyDeleteThe same search works for Elmers too, but it's simpler to use PVA.
Brilliant idea Katie.
-R
katie, thanks for a great tutorial. i can't wait to try it! if the wood will be handled alot would it be a good idea to seal the ink with another coat of modge podge? or would that mess up the image?
ReplyDeleteThis is SO COOL!
ReplyDeleteCan't wait to try this.
ReplyDeletethanks
Pure genius!! Where did you ever learn this trick?! I see some fabulous personalized puzzles in my family's future...
ReplyDeletehref="http://livegreen-savegreen.blogspot.com/>Live Green, Save Green: a sustainable blog
That is so cool! I'm a follower!
ReplyDeleteDena
This is great! I am thinking a Nativity scenefor the holidays or pictures of family and friends for a child.
ReplyDeleteThis sounds absolutely amazing, but I have a laser printer instead of an ink jet. Any idea if that will work? I'm worried about the glue mucking up the printer -- even if the glue is completely dry, the laser printer uses heat to fuse, I think.....
ReplyDeleteRegardless, I'm bookmarking this for future reference. Thanks for a great tutorial!
Can you use a photo? Or just clip art images for this?
ReplyDeleteHow do you prep the wood? Is there a stain or sealant on it?
So...the ink is water resistant, then? Amazing...can't wait to try this!!
ReplyDeleteJust a quick note to say that I too am in Australia and I have found Mod Podge at my local craft shop and at Lincraft and Spotlight.
ReplyDeleteIt looks so great! I was thinking of making a Nativity scene out of blocks. I'll try this method. Thanks.
ReplyDeleteThis is incredible, thank you, thank you for figuring this out. I'm a photographer who sells photo cards and souvenirs at tourist shops in my city... for me, this is very exciting!
ReplyDeleteNo way! This is absolutely incredible! If I weren't at work right now, trying to sneak a few minutes to catch up with my favorite blogs (for sanity's sake), I'd be whippin' out the Mod Podge and Elmers right now! Thank you so much for this incredible tutorial. So glad I discovered you through Craftapalooza!
ReplyDeleteLove this idea, and I linked to it on my weekly roundup (post is here). Thanks for sharing! (And it's always really cool to see a blogger answering questions in the comments - that rocks!)
ReplyDeleteThis is fantastic!!! Thanks so much for sharing!!!! I will try it immediately.
ReplyDeleteI was thinking of making a Nativity scene out of blocks. I'll try this method. Thanks.
ReplyDeleteamerican kobe beef
Hi there...this looks fantastic...only I can't get it to work with my Canon inkjet printer...(following all the instructions to a "t") I've seen elsewhere for a similar technique that Canon ink was a problem...can people comment on what printer models they are using and have this working with? Much appreciated!
ReplyDeleteI LOVED this tutorial! I just tried this with a canon printer and it worked fine! Here is what I did http://somethingaboutkatie.blogspot.com/2010/01/transfering-images-to-wood.html Thank you for the tutorial and I posted a link to your project so others I know could try it!
ReplyDeleteHi! I've tried this twice now, once with the cardstock method and once with the transperancy, and it's not working out for me. With the cardstock method the ink ran off with the paper in the water, and with the transparency method half of the glue peeled off (with the image on it still) and the other half stayed on in a mess. What am I doing wrong? I followed the instructions.
ReplyDeleteWonderful project! I am definitely going to try it.
ReplyDeleteTwo questions though....I would love to do a set of perosnalized wooden building blocks for a child. a) Would you recommend doing so? b) Do you feel the image(s) would quickly wear off?
It has always been my belief one can measure a true Artisan or Professional not only by their talent but their willingness to share their expertise, so....I THANK YOU. You definitely are both.
I just found your blog today! How lucky am I? I have a small plate with a painting of grapes and leaves that I just love. I want to copy the image onto my upper kitchen cabinet doors and thought I would have to free-hand it (Ugh, I am not a very good painter), but I am hoping this method would work on a painted wood surface as well. What do you think? I also sent you this question in an email. I'm so excited to have found this!
ReplyDeleteI linked here from modgepodge amy's blog. I am going to try this right away! And of course come back for more fun things to do!
ReplyDeleteHi Katie,
ReplyDeleteI'm trying to personalise a drumstick. I tried transfer paper (the same used for t-shirts) but that leaves a wax around the image and the transfer wasn't perfect like yours.
Do you think you technique might work?
Will this work on wood that's been coated with polyurethane, or should I apply the labels first, then coat?
ReplyDeleteThanks for the tutorial. I will have to give it a try.
ReplyDeleteWONDERFUL! Thank you so much!
ReplyDeleteThanks for the tutorial! I'm thinking this is going to be a great find for miniaturists! Going to give it a try this weekend.
ReplyDeleteFor those of you having trouble with this technique, it's because your inkjet printer uses water soluable ink. Just about all HP and Canon injet printers use water soluable dyes that smear when they get wet. Epson printers use waterproof pigments instead of dyes, and that is why the technique is successful with Epson printers. My guess is the technique would also be successful using images from laser printers because their toners are also waterproof. Most copy stores (Staples) use laser printers and their copies are cheap (a color copy is about 50 cents). Make sure you bring the specially prepared card stock for them to print on, but don't tell them its got dried glue on it! BTW, since Modgepodge and Elmers Glue are PVA's they are both water soluable and I should think interchangeble for this technique. You can make the surface of your inkjet image waterproof by spraying it with a clear acylic sealant (let it dry for about one hour) available at most hardware and hobby stores. However, Im not sure it would help with this technique because the water would still soak in from the back of the card stock and smear the image from behind. Try a laser copy, it may work.
ReplyDeletewhat would you suggest for dowel rods???
ReplyDeleteim doing a project with them and need to put a smal pic on it
Uauuu!It looks great. Thanks.
ReplyDeleteElis
do you think this would work with glass?
ReplyDeleteThanks for your sharing! clear n details. ;-)
ReplyDeleteI've linked you in my personal blog. ^_^ Great Blog here.
ReplyDeleteHi. I'm finally getting close I think but I'm having trouble getting the cardstock to make full contact with the the wood, even when I clamp another piece on top. should I be using more mod podge or elmers? Thanks!!
ReplyDeleteWOW! i never would have thought of this in a million years. thanks for sharing!!
ReplyDeleteIs this project water/weather proof?
ReplyDeletethis is fabulous! I have a random question.... I want to do this on some wooden coasters I have. I want to paint the wood so that they are colored instead of raw wood. does anyone know if you can transfer the images as directed above on top of acrylic paint. Would it work the same if I painted the coasters, let them dry and then modge podged on top of it?
ReplyDeletethanks!
Will this work on metal too?
ReplyDeleteyeah, would this work on metal?
ReplyDeletelike say, a galvanized keychain..? please answer asap. thank you! :)
URGENT, what sort of stain, or finish did you use on the wood?
ReplyDeleteWow!! This is so great. You are so AWESOME!!...I am going to try this..Quick question..Can I use a hair dryer to dry it off so I do not have to wait over night? Thanks so much. You rock!!
ReplyDeletehaven't tried the card stock yet but have been using those ridiculously expensive transparent sheets (but they are quick). haven't had a flawless one yet but am working out the kinks. i have a hp printer and maybe thats the problem, anyone have any luck with hp printers? I had best luck with using the laser print side of transparent sheet for my inkjet with dried glue and one without any glue just modge podge on surface. They both came out pretty good in their own way. I am using gloss modge podge wonder if that is the problem, too slick.
ReplyDeleteHI
ReplyDeletewow, amazing,there is more than one mod podge which do you suggest
thanks
I've tried card stock and transparencies and both times the ink would lift. I'm assuming it has to do with my HP printer and it's non-waterproof ink. Thinking of an Epson printer because it uses waterproof ink.
ReplyDeleteOkay, I need some help over here! Please check out my photo and tell me what I am doing wrong! This is my second attempt, and they image keeps coming out "streaky" and there is ink bleeding everywhere (I use an epson stylus photo printer). Thanks so much!
ReplyDelete<3 Jesyka
... the link to the image would help! http://jesykaditri.com/?attachment_id=1206
ReplyDelete(Ha, sorry, I always send emails about attachments and then forget the attachment! Silly)
This is amazing!!!! I am going to do this!!!
ReplyDeleteGreat great great idea.
Do you think this would work on a t-shirt?!
Do you know of any way to transfer an ink jet image to fabric?
I love it! How in the world did you come up with this? I'm brainstorming as I type about what I can do this on:)
ReplyDeleteThis is a perfectly timed find as I just bought some coasters from Spotlight to make photo coasters for a gift.
ReplyDeleteAnyone tried the transferring onto acrylic paint?
Would this method work on plates?
Nicole-the issue would be what you would have on the t-shirt in place of Mod Podge without it looking too rough? I am guessing if you used the card stock you could iron on the transfer? Maybe?? Assuming the heat doesnt melt the image?
I hope nobody already asked this...I want to transfer a picture onto a piece of wood that has been stained. Do you know if this will work, or does it have to be bare wood?
ReplyDeleteI tried this twice and it worked but the images are very dull. I used an HP printer and bare wood. In the instructions, the block looks coated. I'm going to try that next time. Thank you for this wonderful idea!! This has sparked lots of ideas for craft projects! I wonder if it will work on glass??
ReplyDeleteMy art-major-husband said he used to do transfers in printmaking class. Take an image printed with heat-sealed ink (laser or photocopy), place it face-down on your surface, and soak it with acetone. The image will stick and the paper will dissolve! You can use this on sanded wood, metal, plastic, ceramic, etc. --- anything smooth. Just be sure to seal it afterwards so it won't rub off.
ReplyDeleteI've use water slide decal paper often and loathe (LOATHE!) the edges. However, I have now become a meticulous X-acto knifer! Can't wait to try this technique and save some time!!
ReplyDeleteI just found your post via google search! You are a genius!!! Love this idea and how simple it sounds. Can't wait to try it! Thanks for sharing!!!
ReplyDeletehey, cool! just wanna know what kind of mod podge you used. matte or gloss?
ReplyDeleteI zoomed in on the pic and I think it was a satin mod podge from what I can read. I just got all the supplies and can't wait to try this. I'm thinking of decorateing toy boxes for each of my kids and this would be the perfect way to do it. Can I use this over paint though and can I use something to waterproof the wood before I transfer the image?
ReplyDeletewow this worked great! Im making self promotional pieces for my photography and this is working great for putting my logo on wood! Thank you for sharing this!
ReplyDeleteI substituted elmer's glue all for mod podge (thinking it's a permanent glue based on some info from the internet). And after waiting for it to dry overnight, i run the project under my tap and was surprised to see the seeming dry elmer's glue-all became tacky and wet again and peeled off together with the paper.
ReplyDeleteI guess i need to get mod podge this weekend. I saw a shop selling them in the city. Good thing i'm headed that way tomorrow.
I NOTICED MY MOG PODGE SAYS WATER BASED, DO I HAVE THE RIGHT STUFF?
ReplyDeleteTHANKS,
LAURA
Does anyone happen to know if this works on ceramic tiles? and using a canon inkjet printer?
ReplyDeletewell i dont know what i am doing wrong i have done it twice the first time i all the ink came off i have a hp printer so the second time i got a photocopy and all seem ok for a while no ink came of but i lost lots of the image it just started to peel of the wood, can anyone tell me what i am doing wrong, thanks janet
ReplyDeleteHP inks arent waterproof. I messaged them today and they confirmed it. Canon inks you want to use the PIGMENT black one. Thats the waterproof one.
ReplyDeleteMore info can be found here: http://www.oddparts.com/ink/faq19.htm
Seems so summerise it nicely.
I cant wait to try this as I want to make wooden wedding invites and all the engravers are really expensive, this might be a great alternative!
This is great to do for Pumpkins Print in Black and White soak onto pumpkin and you can fill in the lines with a marker then Carv The Black with a Lenolium Scraper clean the inside and put a light in it create awsome works of art pretty quickly
ReplyDeleteIs it okay if i apply the layer of glue after i printed the image onto the paper?
ReplyDeletei can't draw to save my life but have been dying to make story dice for my son on wood blocks and this is PERFECT!
ReplyDeleteWoow!!! Amazing idea, I was looking for tutorials how to do it and saw yours on Youtube - You explaining it very well, I have just a Q. if i would like to color the wood ? how i can do it ?
ReplyDeleteThanks a lot - xo Rachel
Will this transfer method work better with a laser printer? I'm going to try but just wondering? Love your tutorials!
ReplyDeleteOkay, so no one else has asked this question, that I can see, so it must be really stupid. But I'm going to ask it anyway...how do you get wording to print mirror-imaged on the computer?
ReplyDelete@Anonymous - it's hard to tell you exactly, because it varies from printer to printer, but there's usually an option in your printer settings to print it mirrored. When you're getting ready to print, click "properties," and then look around. Mine is in a tab called "finishing."
ReplyDeleteAnother FYI, my experience with my HP printers has been that the color ink doesn't work well with techniques like this ('though I haven't tried this exact one yet), but the black ink DOES.
F**KING AMAZING!!!
ReplyDeleteWill this work on painted and waxed wood or does it have to be raw wood without paint or sealer?
ReplyDeleteThanks of your time. I have been trying a lot of different methods, but not working well with the painted/waxed surface. Thanks, Audrey
will this work with photo inkjet paper or does it have to be plain copier paper?
ReplyDeletedo you have to use cardstock to get a good transfer or will regular computer paper work as well?
ReplyDeleteI'm doing a test run as I type this. I used regular printer paper and it printed fine so hopefully it comes out alright!
ReplyDeleteThanks for this excellent how-to!
To those of you asking "Will this work on _____," I say to you, TRY IT AND SEE. It's not her job to test every substrate for pity's sake.
ReplyDeleteSmokingpope, she says she used card stock. I used Epson double-sided matte paper, and it worked fine.
I did my first one last night. I used an Epson printer with pigment inks (not all Epsons use pigment inks). I let it dry over-night for a total of 8 hours. This morning I ran it under tap water and rubbed the paper away. Where I rubbed firmly on the inked areas, I rubbed some of the ink away. After that, I rubbed more lightly. I even used a semi-dull, non-serrated steak knife to gently lift away the last bits of paper on the inked parts. Worked great. I used a scrap piece of pine I sanded smooth before applying the mod podge and image. Running the wood under water and then drying caused the it to warp slightly. This could be a problem for me as I want to use this process to apply images to ukuleles I'm building. The wood in those is very thin and will likely warp as well, which just won't do. I'm going to try using a damp sponge and see how that works. I suspect it will take longer and will require many applications of the damp sponge. I will report back here to let you know how it comes out.
Thank you, Katie, for figuring this out. I've tried multiple processes, and so far they've all been inconsistent. My best luck was with T-Shirt transfer paper and a heat press, but those results were inconsistent, not to mention the heat caused the glued butt joints to weaken as well.
I have tried several times, first i did not use cardstock paper, then realized that may be the issue... I have followed all of the steps correctly and still seem to get only a slight image on the wood.
ReplyDeleteThe wood I am using is oak, do I need to use something more simple?
Thanks!
Hi Katie!
ReplyDeleteI just tried this last night, I let it dry or 12+ hours, and when I soaked the paper off in running water, the design washed off too! I used modge podge, but is there a specific modge-podge you used, or am I just being silly!
Help!
Sarah
I tried this with an old HP printer, and a glue-coated transparency. However, I used Elmer's Squeez'N Caulk (siliconized acrylic latex) to adhere it to the wood. The image came really nicely off the transparency and the caulk did a really nice job playing the role of Mod Podge, plus it's inherently waterproof. However, I tested a rather detailed image (I'm a photographer and I want to use this technique for custom items), and it came out a bit fuzzy, and fairly dark. I tested another place where I'd primed the wood first, and the image didn't stick at all. I just bought a laser printer yesterday, so I'm going to try the same thing with that, although the challenge will be finding really light-colored wood. Still, super technique!
ReplyDeleteHi
ReplyDeleteI just wondered, would normal PVA glue be okay instead of elmer's washable glue? They on't stock that as easily in the UK.
Thank you!
I love this idea, and thanks Dawn for the other option of using a transparency! My problem is, I cannot find Modge Podge here in my corner of France! What type of glue would be a good alternative? Thanks!
ReplyDeleteBrilliant!!
ReplyDeleteMany have asked if this technique would work on metal or painted surfaces. I am wondering if anyone has tried it yet?
I want to make a gift for a party in about 36 hours (nothing like a little procrastination to inspire, uh, panic!!) thanks so much everyone for any insight you share!
It's 3 years later and I'm just finding this tutorial. I'm having the same trouble Kim is having. I have an HP, printed on "Best" print quality, used copy paper as my 'cardstock' and jammed 1 page, but the second page went thru fine. adhered everything down, waited overnight and just took the paper off.
ReplyDeleteThe glue softens, and so does the ink..but mostly in BLUE color range. the black and red seems to embed into the wood. I'll try the transparancey method Did Kim ever solve the issues she was having?? Thanks, it's a fab idea and looks like it will work great on some projects, i just need to PRACTICE!
I'm having a hard time sourcing Mod Podge here in the Philippines. Any alternatives? They say watered down Elmer's glue will also work.
ReplyDeleteHave a question. You show this being applied to a clean wood surface. I was wondering if it would work on a painted surface as well. Ex. You have a wooden surf board. You put primer on it and then use a paint as the background color. Then you want to put an image on top of the paint before you add the finish. Could you put the mod podge on the painted surface and follow all the steps you mentioned and then apply a layer of finish? Would it adhere to the painted surface?
ReplyDeleteI've just tried this and am having rocky results, too. I let the elmer's school glue dry overnight, then printed on it using my HP inkjet printer, which I then put onto my piece of wood which was lightly covered in mod podge. I let that dry for about 24 hours until I used water to try to peel off the paper. most of the image came off with the paper. I have a very light version of the photo still on the wood, but it's almost that kind of... antique look, with most of it faded away and the colors a little off. Any ideas?
ReplyDeleteLove this idea but mine came out really faded.... not all beautiful and vibrant like yours. It seemed the more the glue washed away the more the picture came off too :( maybe it's my printer? It's a fairly new inkjet...
ReplyDeleteKatie, I found your tutorial from Karen at the Graphics Fairy and tried it today. For the most part I'm happy with it but I've got a problem with the Mod Podge that's left behind. See photos on my blog: http://bluestarantiques.blogspot.com/2012/06/another-stool-and-another-challenge.html
ReplyDeleteHave you had an issue with this? Help!
So are we suppose to use a laser printer or an inkjet printer? That's the only question I have...
ReplyDeleteIf you use a laser printer you can iron the image directly onto the wood with no glue or water involved.
ReplyDeleteIn your view, would this technique work
ReplyDeleteOn a surf board?
I had a problem with the elmer's glue. It washed away and the picture went with it; so I tried Mod Podge on Mod Podge. I loved how it dried on the paper, but it changed the color of my photograph. When I transferred it it smeared, but I think I put too much Mod Podge on the block. I will try it again next and I may try a mix of the elmer's with the mp. Or I may try it with thin layers of each...
ReplyDeletehello i just tryed this, i put glue on the card stock and put it threw the printer (glue side) and then coated the wood with mod podge. (which is the yellow one) (water base sealer and glue finish right? )i pressed down and waited 20 hours to dry. ran it under warm water and rubbed and softly peeled at the edges i saw the image ! i was so happy and then it washed away 2 seconds later and i touched it with my finger and the image rubbed right off with the glue. why isnt it sticking to the wood? why is it comming off with the extra glue on the board? help ! i need to get this right !!
ReplyDeleteLove this! Do you have to use cardstock or can you use regular printing paper??
ReplyDeleteDoes this work on spray painted wood? Or even spray painted metal?
ReplyDeleteI wonder if this would work on glass too?
ReplyDeleteI'm having the same smear problem... I've done one over night and then one in two hours.. both smeared.. I'm just gonna gift them and pretend that was on purpose lol
ReplyDeleteCan this be done on fabric?
ReplyDeleteI had the same problem with the ink washing off...have tried this 3 times now..:( Following everything and you make this look so easy peasy!! ???
ReplyDeleteCan this technique be on glass or just wood?
ReplyDeletecan i use acrylic gel medium instead of glue?
ReplyDeletehow do you do the letters backwords on the computer?
ReplyDeletehow do you do the letters so that they come out right?? Meaning so that they aren't backwards?
ReplyDeleteHi Katie would this technique work on fabric?
ReplyDeleteThank you so much! I can't wait to try it!!!
ReplyDeleteI had my doubts, but it works! Here's what I made: http://trophyw.blogspot.com/2013/01/bee-mine.html#
ReplyDeletethank-you so much for sharing!
how can you do this on fabric?
ReplyDeleteKatie, Thanks for all of the useful ideas! I can't wait to give some of my ideas a try! I am so glad that I found your blog! Feel free to check out my blog too...www.ltreedesign.com
ReplyDeletecould someone tell me what paper setting to choose when printing the image on an Epson R2880 printer ? or doesn't it matter? and has anyone done this with Epson ultra chrome K3 inks? This looks like a great technique and I'm eager to try it out!
ReplyDeleteJay
i do the same method but i never use print paper posters from walmart did a life size justin beber for little sis on her wall best way just like wallpaper soak in warm water threw wall paper machine smooth out on wall then take back off u no how u just dont like that wallpaper and all u can get off is that damn first layer same thing here or just elmers glue too surface and take wallpaper steamer and take off that way no d mod no water ive done my bike with photos of my children and i used the photo from walmart things u cant use is magazines cant be to sided i even did the sistine chapel on a wall i was michelangelo for four days it took him four years
ReplyDeletehow can I use it on a bookcase?
ReplyDeleteCan you do this on a piece of wood after painting the wood?
ReplyDeleteThis looks like an interesting idea! But I cant find mod podge here in Saudi Arabia. .is there anything else I could use? I have elmers washable glue.
ReplyDeleteDo you think this would work to transfer images to glass?
ReplyDeleteI Love your Ideas and the Tutorial Just Fantastic. I have been looking for a process (Easy) for a LONG time -- as you can see by the date you are getting this! Don't know why I didn't fint if earlier! Wasn't my time I guess!
ReplyDeleteONE QUESTION -- Have you tried it on curved wood surfaces? anything new since you posted this -that would help in doing this??
Uhh I don't know how to select a profile to "Comment as:" all new to me!! So I will choose the "anonymous" But sign it below. Look me up on facebook? Maybe?
I'll just keep checking back - OK
HOPE YOU ARE STILL THERE!!!
Thanks! Bonnie Leigh
You made it look as if transferring images to wood is so simple.I am very interested in getting the skills to become as creative as you are. This wood blocks would be great starters for nice DIY tasks.
ReplyDeleteI am visiting from the Graphics Fairy. I am planning on trying this method on furniture. Does it still work if the piece is painted or is only for raw wood?
ReplyDeletethis is brilliant. can't wait to try it.
ReplyDeletethanks
I just came across this and was wondering if you think it would work on tile also ?
ReplyDeleteWhen you did the wood table numbers, did you have to sand the wood or can you do the process on an unsanded circle of birch bark?
ReplyDeletestill struggling with this what is transparency as dawn said above and having trouble with the ink coming off even though left for 2 days to dry xxx
ReplyDeleteHi Karen,
ReplyDeletethanks for the post.
Just wanted to know if there is any way to transfer the image onto leather piece or not.
Thanks.
Hi Karen,
ReplyDeletethanks for the post.
Just wanted to ask if there is any way to transfer the image to a leather piece or not.
Thanks.