Faux Vintage Hanger Tutorial
I made some more faux vintage hangers with the mod podge wood transfer technique.
I went totally overboard imagining these places, researching Gilded Age mineral spas, balneotherapy...
...imagining how these places would be decorated and who would go there...
...looking up old New York telephone exchanges. It's my craft fantasy world.
If you want to make some for yourself, it's really pretty easy:
1. Make up whatever graphic design you want in the program of your choice.
2. Totally lose yourself in the details. Do lots of weird research.
3. Check out my old wood transfer tutorial which basically says the following:
a. Coat a sheet of cardstock with Elmers Washable School Glue and let it dry completely.
b. Print your design (after flipping it to mirror image) onto the glue side of the cardstock.
c. With a small paintbrush, brush a thin layer of Mod Podge (matte) onto the printed design.
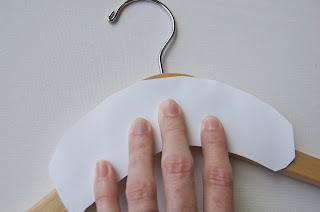
d. Press onto the hanger very firmly and let it dry overnight.
e. Hold the hanger with the paper on it under running water and lightly rub the paper until it all comes off.
4. There it is. You can brush a layer of polyurethane over it if you want.
Tip: Just brush enough Mod Podge to cover the actual design. You don't want Mod Podge glopping out everywhere. It seems to work best, also, to let the paper hang way over the edges of the hanger when you stick it on. If you do get a little bit of the Podge squirming out and it dries, you can lightly sand it off later.
Would you guys like the designs? Here they are! Have fun!


I love vintage hangers. My most prized one is from denmark - my scandinavian grandma picked it up in the 40s or 50s before she moved to the USA.
ReplyDeleteWhat an incredibly cool project! I love vintage hangers and have been dying to try the mod podge transfer technique on wood. What an incredible way to put it all together. Thank you for the excellent tutorial! Best, Jenn
ReplyDeletequick question ... did you use unfinished or finished wood hangers? I tried it on finished wood hangers and it didnt turn out (sadness) so i wanted to make sure before i go for round 2 that im using the right ones ...
ReplyDeleteLove it!! I used your wood transfer technique on clothespins for a clothesline at a baby shower... scrapbook printables from cannon creative park (the borders) were the perfect size. They turned out MAGNIFICENT, and everyone keeps asking where I got them.. I'm going to have print your tutorial to hand out to folks! Thanks for great ideas! So creative!
ReplyDeleteKatie, you are brilliant. I want an entire collection.
ReplyDeleteThese hangers are so beautiful. Vintage is my favorite word. Thanks for the idea. I'll have to try this technique this weekend.
ReplyDeletehttp://altered-artworks.blogspot.com
I can't wait to try your transfer technique. The possibilities are endless!
ReplyDeleteWeee I'm going to make mine with Mrs Watson on it (or maybe Future Mrs Watson) for my wedding dress to hang from on my wedding day :) I think it would make such a cute photo and detail to the wedding!!
ReplyDeleteJust wanted to let you know that I featured your project today on "You Sew Rock Me Fridays" on my blog Sew Rockin'. Here's the link if you want to check it out: http://wp.me/p1VAkT-bU
ReplyDeleteAwesome job, I can't wait to see what else you come up with!
Jamie
Hello, I hope you are still reading comments and answering questions!
ReplyDeleteHow essential is cardstock to this technique? And why the Modpodge Matte over another (satin, for example)?
Thank you!
I am trying to publish my questions again, so I apologize if this is a duplication.
ReplyDeleteHow essential is cardstock? as well as the Matte finish of Modpodge? Why not regular printer paper and the satin Modpodge, for example?
Thank you!
I checked the comments but I don't see anyone asking about the discrepancy between the tutorials. In the wooden block tutorial, you advise painting the ModPodge onto the wood itself. In this tutorial, you suggest painting the ModPodge on the printed paper. I followed the instructions for the hangers, and the images came off the wood and remained attached to the paper. I wonder if perhaps it is necessary to paint the wood with the ModPodge instead of the paper in order that the image remains attached to the wood? Otherwise, I don't know what went wrong.
ReplyDeleteI am satisfied with these suit hangers from Bizarkdeal, exactly what I want. They look wonderful, very nice finish. And they are perfect for hanging my overcoat without any crease on the shoulders, very sturdy. I will buy another set.
ReplyDelete